Category >
ASP.NET
|| Published on :
Monday, August 4, 2014 || Views:
30904
||
Insert Update Delete Records in ListView ListView Tips Tricks Listview Tutorials ListView Controls ASP.NET ListView ListView Control Various Functionality
Introduction:
Here Pawan Kumar will explain How can we Insert, Update, Delete records in ASP.NET Server Control ListView in ASP.NET with C# with screenshot and detailed example. This will help the begineers to learn and implement and make use of very useful ASP.NET Server control :- ListView
According to MSDN:-
A ListView control allows you to display a list of items with item text and, optionally, an icon to identify the type of item. For example, the Windows Explorer list of files is similar in appearance to a ListView control. It displays a list of the files and folders currently selected in the tree. Each file and folder displays an icon associated with it to help identify the type of file or folder. The ListViewItem class represents an item within a ListView control. The items that are displayed in the list can be shown in one of five different views. Items can be displayed as large icons, as small icons, or as small icons in a vertical list. Items can also have subitems which contain information that is related to the parent item. The details view allows you to display the item and its subitems in a grid with column headers that identify the information being displayed in a subitem. The tile view, which has limited availability as described below, allows you to display the item and its subitems as a tile that contains a large icon next to the textual information. ListView supports single or multiple selection. The multiple selection feature lets the user select from a list of items in a way similar to a ListBox control. Additionally, the user can activate selected items to perform a task. For example, you could use a ListView control to display a list of files that the application can then open and utilize. The user can select the files to open and then double-click them to activate the items and open the files in the application. The ListView can also display check boxes, using the CheckBoxes property, to allow the user to check the items that they want to perform an action on. You can use the ListView control in a variety of ways. The control can be used to display information from an application, a database, or a text file. The ListView can also be used to obtain information from the user, such as selecting a set of files to process.
Reference: MSDN Website
Description:
In previous post I explained How to Convert Numbers to Words String in ASP.NET using C#, Set meta tag in asp.net programmaticaly for creating seo friendly websites, How to validate or check whether checkbox is checked or not using ASP.NET and jQuery with example.,How can we call a C# Method from ASPX Page or Code Behind page,
Now I will explain How can we Insert, Update, Delete Records in ASP.NET Server Control ListView in ASP.NET with C# and you can download the complete source code in ASP.NET and C Sharp at the bottom of this page
So Lets starts discussing about the ListView operations which are normally we can do with greate ease . We are going to see how to Insert, Update and Delete operations in ListView in ASP.NET.
To do these operations, We can create our own Table in MS-SQL server which will be get used for operations I have EmpTable table so you need to change the Eval values and queries from code behind to work it correctly. So let's jumps into coding.
You can using the following SQL Script for the Database part:-
USE [test]
GO

/****** Object:  Table [dbo].[Emp1]    Script Date: 08/05/2014 00:28:03 ******/
SET ANSI_NULLS ON
GO

SET QUOTED_IDENTIFIER ON
GO

SET ANSI_PADDING ON
GO

CREATE TABLE [dbo].[Emp1](
    [Id] [bigint] IDENTITY(1,1) NOT NULL,
    [EmpName] [varchar](50) NULL,
    [Day] [varchar](50) NULL,
    [Date] [datetime] NULL,
    [EmpType] [varchar](50) NULL,
    [Deleted] [char](10) NULL,
 CONSTRAINT [PK_Emp1] PRIMARY KEY CLUSTERED
(
    [Id] ASC
)WITH (PAD_INDEX  = OFF, STATISTICS_NORECOMPUTE  = OFF, IGNORE_DUP_KEY = OFF, ALLOW_ROW_LOCKS  = ON, ALLOW_PAGE_LOCKS  = ON) ON [PRIMARY]
) ON [PRIMARY]

GO

SET ANSI_PADDING OFF
GO
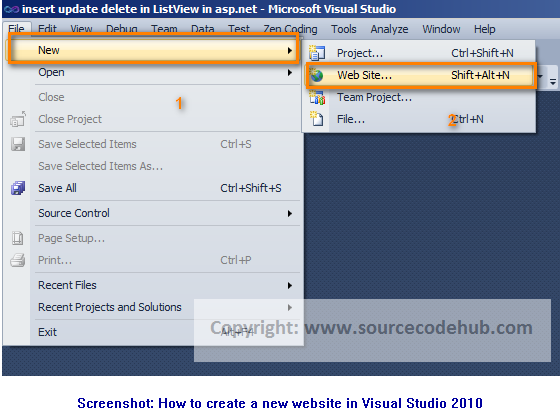
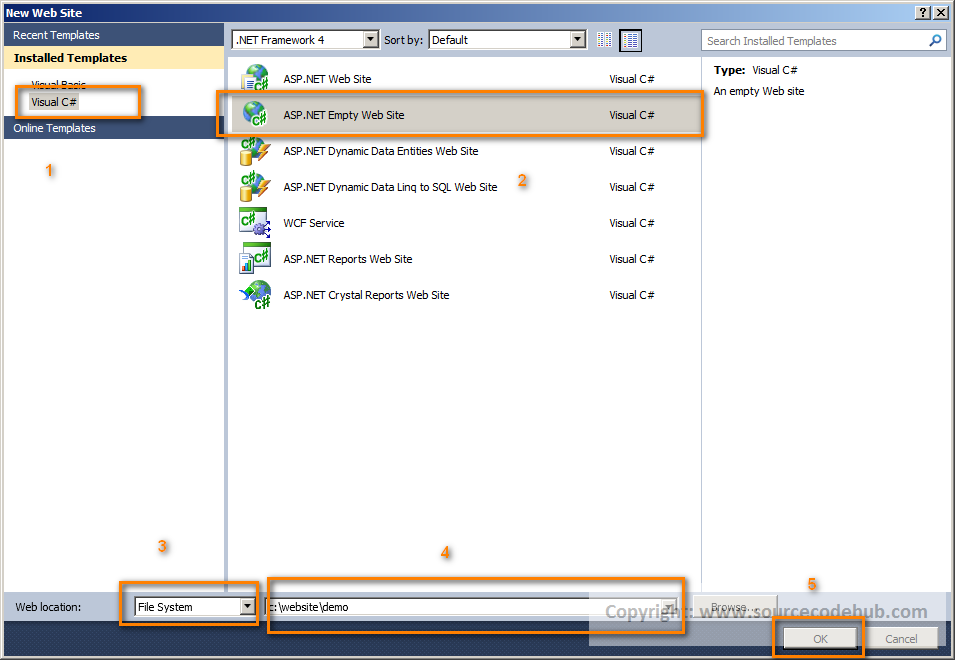
Step 1: Create the Empty Website using any Visual Studio Edition. Here I'm using Visual Studio 2010 Edition.
Step 2: Create a new ASPX Page by Right Click > Add new Item and then Select the WebForm from the listed items.


Step 3: Now add the Listview control from the Toolbar(Left Hand side).
Step 4: Add the Following codes to the ASPX Design Mode of the page.
<%@ Page Language="C#" AutoEventWireup="true" CodeFile="Default.aspx.cs" Inherits="_Default" %>

"-//W3C//DTD XHTML 1.0 Transitional//EN" "http://www.w3.org/TR/xhtml1/DTD/xhtml1-transitional.dtd">
"http://www.w3.org/1999/xhtml">"server">
Step 5: Add the following codes into the Code Behind page(Pressing F7 on the Design Mode)
using System;
using System.Collections.Generic;
using System.Linq;
using System.Web;
using System.Web.UI;
using System.Web.UI.WebControls;
using System.Data.SqlClient;
using System.Data;
public partial class _Default : System.Web.UI.Page
{
string connectionString = @"Data Source=ServerName;Initial Catalog=test;Integrated Security=True";
protected void Page_Load(object sender, EventArgs e)
{
if (!Page.IsPostBack)
{
GetData();
}
}
private void GetData()
{
using (SqlConnection con = new SqlConnection())
{
con.ConnectionString = connectionString;
if (con.State == ConnectionState.Closed)
{
con.Open();
}
using (SqlCommand cmd = new SqlCommand())
{
cmd.Connection = con;
cmd.CommandText = "Select * from Emp1 Where Deleted='N'";
cmd.ExecuteReader();
SqlDataAdapter sda = new SqlDataAdapter(cmd);
con.Close();
DataTable dt = new DataTable();
sda.Fill(dt);
lvEmp.DataSource = dt;
lvEmp.DataBind();
}
}
}
protected void lvEmp_ItemEditing(object sender, ListViewEditEventArgs e)
{
lvEmp.EditIndex = e.NewEditIndex;
GetData();
}
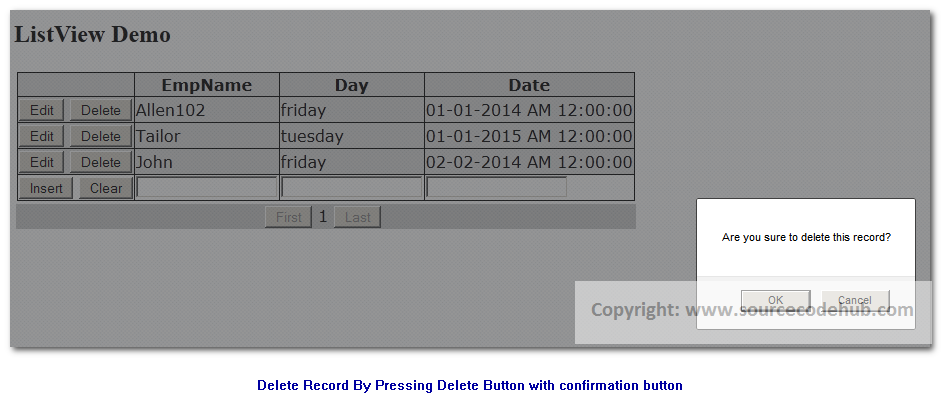
protected void lvEmp_ItemDeleting(object sender, ListViewDeleteEventArgs e)
{
long holidayNum = Convert.ToInt32(e.Keys[0]);
using (SqlConnection con = new SqlConnection())
{
using (SqlCommand cmd = new SqlCommand())
{
cmd.Parameters.Add("@Deleted", SqlDbType.VarChar).Value = "Y";
cmd.CommandText = "Update Emp1 set Deleted=@Deleted where Id=" + holidayNum;
con.ConnectionString = connectionString;
cmd.Connection = con;
if (con.State == ConnectionState.Closed)
{
con.Open();
}
int result = cmd.ExecuteNonQuery();
con.Close();
lvEmp.EditIndex = -1;
GetData();
}
}
}
protected void lvEmp_ItemCanceling(object sender, ListViewCancelEventArgs e)
{
lvEmp.EditIndex = -1;
GetData();
}
protected void lvEmp_ItemCommand(object sender, ListViewCommandEventArgs e)
{
}
protected void lvEmp_ItemInserting(object sender, ListViewInsertEventArgs e)
{
string EmpName = ((TextBox)(e.Item.FindControl("txtHolidayName"))).Text.Trim();
string day = ((TextBox)(e.Item.FindControl("txtDay"))).Text.Trim();
string date = ((TextBox)(e.Item.FindControl("txtDate"))).Text.Trim();
using (SqlConnection con = new SqlConnection())
{
using (SqlCommand cmd = new SqlCommand())
{
cmd.Parameters.Add("@EmpName", SqlDbType.VarChar).Value = EmpName;
cmd.Parameters.Add("@Day", SqlDbType.NVarChar).Value = day;
cmd.Parameters.Add("@Date", SqlDbType.Date).Value = Convert.ToDateTime(date);
cmd.Parameters.Add("@EmpType", SqlDbType.VarChar).Value = "FullTime";
cmd.Parameters.Add("@Deleted", SqlDbType.VarChar).Value = "N";
cmd.CommandText = "Insert INTO Emp1(EmpName,Day,Deleted,Date,EmpType) Values(@EmpName,@Day,@Deleted,@Date,@EmpType)";
con.ConnectionString = connectionString;
cmd.Connection = con;
if (con.State == ConnectionState.Closed)
{
con.Open();
}
int result = cmd.ExecuteNonQuery();
con.Close();
}
}
lvEmp.EditIndex = -1;
GetData();
}
protected void dpgHoliday_PreRender(object sender, EventArgs e)
{
GetData();
}
protected void lvEmp_ItemUpdating(object sender, ListViewUpdateEventArgs e)
{
long Id = Convert.ToInt32(e.Keys[0]);
string EmpName = ((TextBox)(lvEmp.Items[e.ItemIndex].FindControl("txtHolidayName"))).Text.Trim();
string day = ((TextBox)(lvEmp.Items[e.ItemIndex].FindControl("txtDay"))).Text.Trim();
string date = ((TextBox)(lvEmp.Items[e.ItemIndex].FindControl("txtDate"))).Text.Trim();
using (SqlConnection con = new SqlConnection())
{
using (SqlCommand cmd = new SqlCommand())
{
cmd.Parameters.Add("@EmpName", SqlDbType.VarChar).Value = EmpName;
cmd.Parameters.Add("@Day", SqlDbType.NVarChar).Value = day;
cmd.Parameters.Add("@Date", SqlDbType.Date).Value = Convert.ToDateTime(date);
cmd.Parameters.Add("@EmpType", SqlDbType.NChar).Value = "O";
cmd.CommandText = "Update Emp1 set EmpName=@EmpName,Day=@Day,Date=@Date,EmpType=@EmpType where Id=" + Id;
con.ConnectionString = connectionString;
cmd.Connection = con;
if (con.State == ConnectionState.Closed)
{
con.Open();
}
int result = cmd.ExecuteNonQuery();
con.Close();
}
}
lvEmp.EditIndex = -1;
GetData();
}
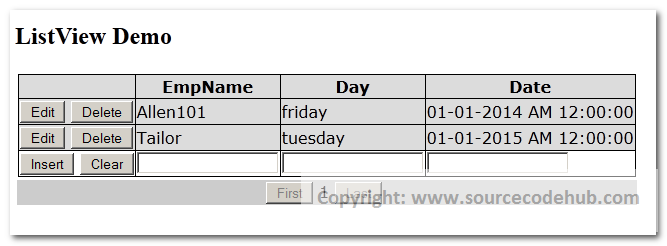
}
Step 6: Run the Application by pressing F5. Output will be like below

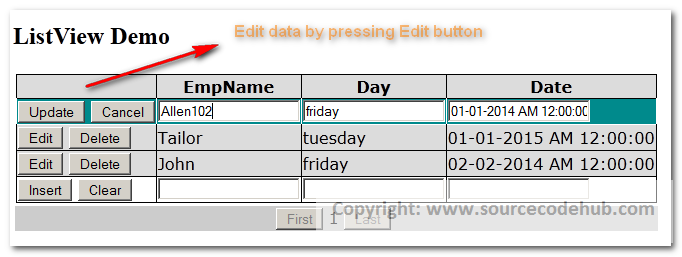
Conclusion
Thus, we have learnt How to provide edit/update/delete and insert feature for ListView Control. We can also handle these edit, update, delete and insert events in ItemCommand of ListView control. Since, ListView is capable of displaying the data in user defined formats these features will be very useful to do these operations in those layouts itself.
Please Note: Download the code attached with this article to see it in action.It also include the SQL Table Script
Download Source Codes